
A Beginner's Guide to Dual Booting Linux Mint and Windows XP
By Shane Lazar
This article is a first for me. I wrote it for a friend of mine who is interested in trying out an Operating System (OS) that I have a habit of promoting - you guessed it, we are talking about Linux. But he is unsure how to go about it and is not really ready to get rid of Windows - yet. And I understand him: moving to a new OS can be unnerving and would be easier if it was done in phases. I promised I would help him, but since he is in another country, I decided that writing an article would be the best way to go. In this spirit, I am going to show how to go about this by actually going through the steps of the installation.
What is Linux Mint? This is a rather new distribution that is based on the very famous Ubuntu Linux distribution. Linux Mint is, in my opinion, easier for new users - since most of the bells and whistles, including support for proprietary hardware, is supposed to work out-of-the-box. And in its latest incarnation, Linux Mint 2.2 Bianca, things just got a lot better!
First, you will have to download the install CD image (LinuxMint-2.2.iso); it's about 700MB, so it will take some time. Once you have it, you can verify it by getting the checksum file and following these instructions. Then, you will need to burn this image file to CD. This does not mean just adding the LinuxMint-2.2.iso file and burning a data CD. Here and here are two websites that explain how to do this in Windows. I recommend that you burn the CD at the slowest speed possible to avoid errors. Once you are done, there should be two folders on the CD named casper and isolinux, and a file md5sum.txt. If not, something has gone wrong and the CD will not work.
In all my messing around with installing various distributions, I have never faced
a scenario where I lost all the data on my hard drive - and I have certainly done
enough messing around. However, better safe than sorry - so, I would recommend you
backup all the data on your computer. I am just avoiding any possible lawsuits
here...  No, really - do make sure to back
up.
No, really - do make sure to back
up.
Next, you will need to make some space on your hard drive in which to install Linux. Mint needs an absolute minimum of 3GB, but I would strongly recommend at least 5GB - with hard drives as huge as they are today, there's no excuse for cramping yourself (more would be even better.) Make sure to run Disk Defragmenter and defragment your entire hard disk, so that all your free space is located in one big chunk and not spread out in little bits. Now, I am not sure how it works in Windows - it's been a while since I used it - but you probably should not use your computer while defragmenting (otherwise it starts defragmenting from the beginning each time there's a write to the hard disk.) Linux avoids this whole problem by not allowing the hard disk to get fragmented in the first place. Clever, huh? Once you are done with this, we can move to the fun stuff - installing Linux Mint!
Put your newly-created Linux Mint CD into the CD/DVD drive and reboot; you may need to set your BIOS to boot from CD before the hard disk. On booting from the CD, the first screen you'll see is the boot options screen below.
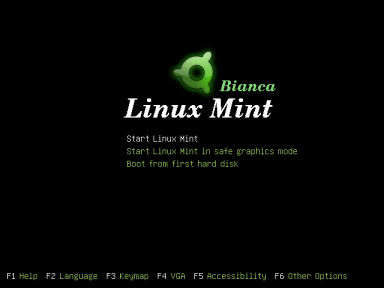
Just hit Enter, sit back, and watch the pretty boot splash as Linux Mint starts up. When everything is loaded, you'll be greeted by a very attractive desktop that can only be appropriately described as mint! Have a look.

Linux Mint is a Live CD. This means that it boots into a functional OS that runs entirely from the CD. And while in this state you can use it without making any changes to you hard disk. The disadvantage is that you cannot make permanent changes. Each time you reboot all changes are lost. Also, depending on the amount of RAM you have the Live CD is slower than an OS installed on the hard disk. So you can play around with it as a Live CD if you are just trying to see what Linux Mint is all about. But we're not here to play around, we're here to dig into the real stuff! See the Linux Mint icon on the desktop labeled Install? Double click it and we'll be on our way with the installation.
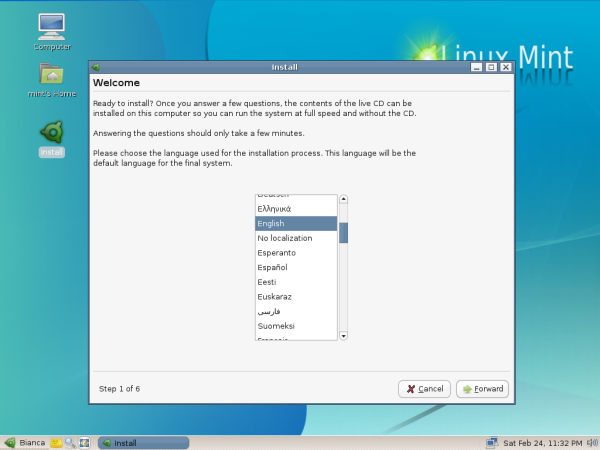
Now, the installation dialog pops up. The first thing I noticed is where it says 'Step 1 of 6' on the bottom left. 6 steps?! Is that how easy installing Linux has become? You bet it is! If we were not going for a dual boot setup, any sort of guide would be totally irrelevant. But don't worry - setting up the dual boot isn't hard either.
Back on track - the first screen is self-explanatory. Choose the language you want for your final system and click Forward.

The second step is just as easy as the first: simply choose your time zone from the drop-down list. Optionally, you may click on your region in the world map, and the map will zoom in allowing you to select your city directly. Then click Forward again.

Now, it's time choose your keyboard layout. You can test your keys in the field below the lists (as I have demonstrated). This is so easy... Remind me again, why does this need a guide?
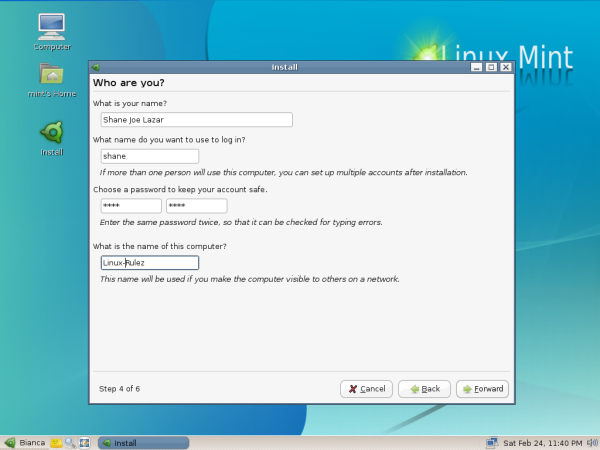
Who are you? No, we don't want a philosophical rant... just enter your full name and the name you want to use to log in. Enter your password twice, and a name for your machine. The account created here will be the administrator account with full control of the OS. I will talk about user accounts at another time. Forward...
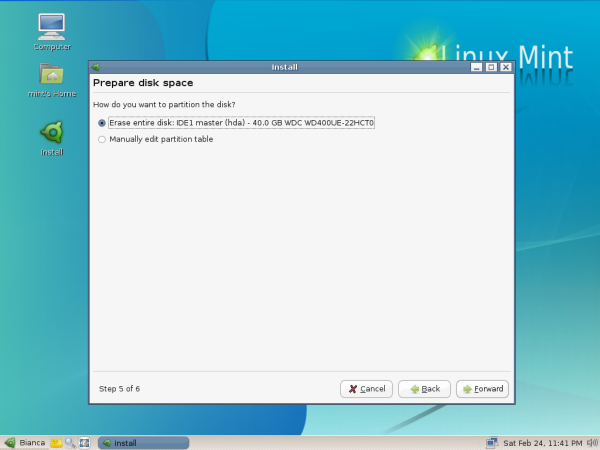
Guess what: we've reached the 'hard' part - disk partitioning. We don't want to erase the entire disk, so we choose the second option. We're going to do this manually! Forward.
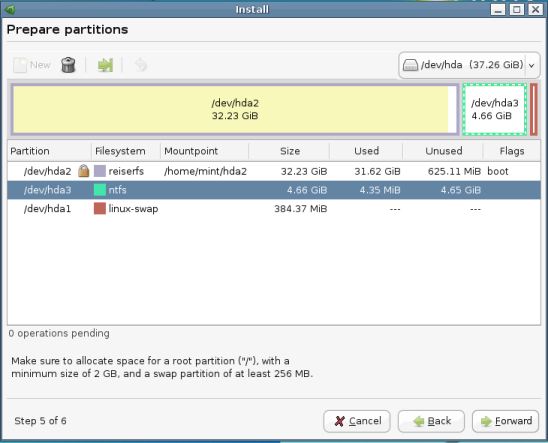
This opens the partition editor application. It will scan all your hard disks and display the present partitions and all their details. If you have more that one physical hard drive, then you can switch between them using the drop-down menu at the top right. Your master drive is usually first - i.e., hda or sda. The slave will be hdb or sdb. And the partitions are numbered as hda1, hda2, hda3 and so on.
If you are attentive, you will notice that my hard disk is divided into three partitions - hda1 is my linux-swap partition, hda2 holds my main installation of Ubuntu Linux and hda3 is my test partition which I use to play around with other Linux distributions. But in this case it is an empty NTFS partition, the file system which Windows XP uses. I am not about to delete my Ubuntu partition just so I can show you how to resize an NTFS partition. So imagine that hda3 is the partition in which you freed 5GB (or however much) for Linux at the beginning of this guide. If you are thinking in terms of C:\, D:\, E:\, etc. drives in Windows, there is no direct correlation between that and the Linux hda1, hda2, hda3, etc. naming system. I suggest going by the size of the partitions and the free space available in each one to know exactly which partition you are going to resize. Right-click on the partition you wish to resize and select Resize/Move. The following dialog will pop up:
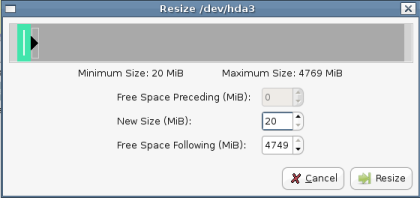
There are a number of ways you can define how you want to resize your partition. The easiest way is just to type the number of megabytes you wish to have for Linux Mint in the last input field where it says 'Free Space Following (MiB)'. For 5GB, you would enter 5000 there. I have less than 5000 in that field, but I am the teacher here - I am allowed to cheat! Actually, I am not. The partition editor will not make any changes until you tell it specifically to do so by clicking the Apply button. So for now, click Resize.
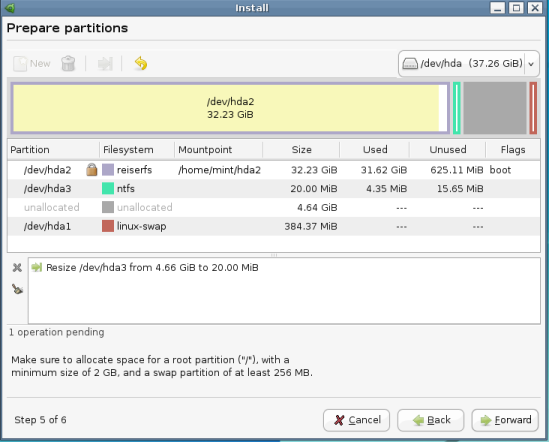
As you can now see, the NTFS partition has been reduced and there is now some unallocated space after it. This is where Mint is going to live.
[ Be careful when altering partitions. Make sure you have a backup of all valuable data and be sure that your computer isn't interrupted when performing the resizing operation. If you know that the system may hang or is unstable, don't do it or try to use a fresh or otherwise unused harddisk. -- René ]
Next, you need to create a primary or an extended partition. This depends on how many partitions you already have on your hard disk and what kind they are. A hard disk can have a maximum of four primary partitions. If your partitions are named hda1 through hda4, they are primary partitions. hda5 and above are extended partitions. So, if you have one or two primary partitions, you can create primary partitions; otherwise, you will will have to create extended partitions.
Every Linux installation needs a swap partition; it is the equivalent of the Windows paging file. Think of it as an extension of your computer's RAM. The general rule is that the size of your swap partition should be the amount of RAM on your machine multiplied by 1.5. However, nowadays with the size of RAM getting very large, the size of swap doesn't need to be very big. I would consider 512MB as a maximum for desktops. Linux Mint recommends a minimum of 256MB. Click on the unallocated space and then click the New button at the top left to create a new partition.
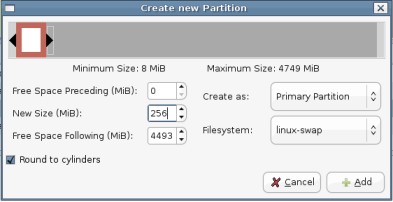
Simply type the amount of swap space that you want in the 'New Size (MiB)' field. As an example, I have 256MB RAM and my swap space partition is 384MB. This much has been more than adequate for my computing needs. I don't need another swap partition - Ubuntu and Mint can both use the one I already have. The space for the swap partition is what I took out of the 5GB earlier when I 'cheated'. Then choose if it is going to be a primary partition or an extended partition, as appropriate, from the drop-down menu, and select linux-swap from the other drop-down menu. Click Add.
Now we will create the partition where we are going to install the actual OS. Click on the remaining unallocated space and then click on the New button at the top left.

Make sure this partition fills the entire unallocated space - the 'Free Space Preceding' and the 'Free Space Following' fields should both be 0 (zero). Again select primary or extended partition appropriately and choose a file system in the lower drop-down menu. Linux Mint defaults to ext3 which is tried and tested. I prefer reiserfs which is newer and has some performance advantages over ext3. Take your pick. After all, that is what Linux is all about - freedom and choice! Go ahead... click Add.
Have a look at the pending operations in the partitioning application window; check and see if your partitions are the way you want them to be. There's no turning back after this. Take a deep breath and click Apply.
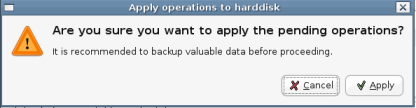
Oops, wait... a warning pops up... click Apply again!
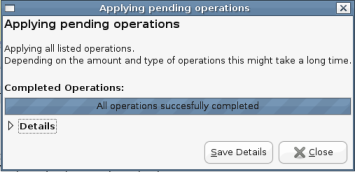
And... success! Click Close.
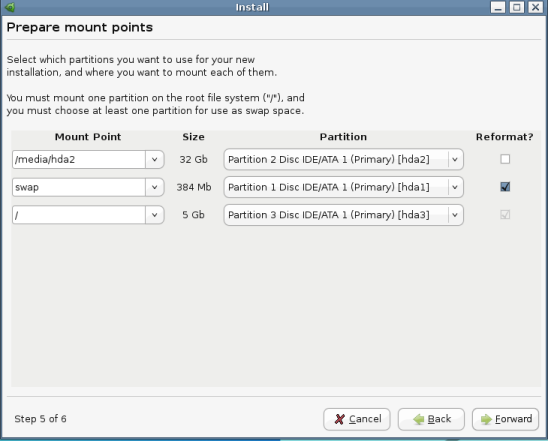
Finally, we reach the end of our lengthy step 5 - partition mount points. Verify that the partition you created for Linux Mint is mounted at /, the swap partition as swap. The rest go under the /media/hd* mount points according to their partition numbers. I am not sure if the NTFS partitions are mounted here by default, since I deleted my NTFS partition. If not, there is a tool to do this later on. Also check that the / and swap partitions are marked for reformatting and the rest are not. That's it - bravo, you are done with partitioning! Click Forward.
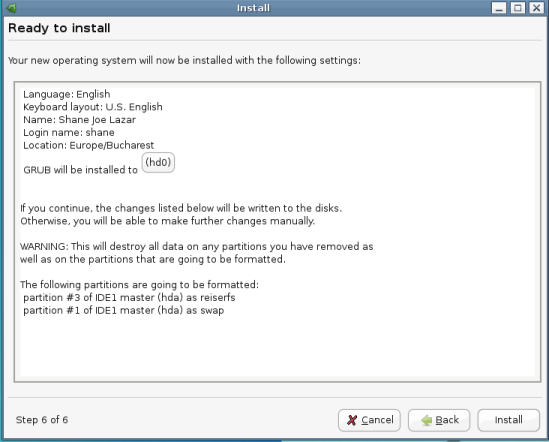
Here we are, at the final step! Actually, this is more of a summary of what the installer will do. The only option here is choosing the location of GRUB, the boot loader (the first thing you will encounter when you boot your computer.) Don't change anything here; most likely, it will work just fine as is. Now, bravely click Install.
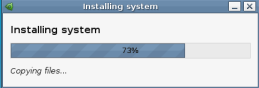
The installation will take about 20-25 minutes, so you can go do whatever it is you do when you've got nothing to do. I fixed myself a midnight snack - eggs and baked beans... No, its not what Linux people eat... It's what lazy people eat. At least nobody is going to bother me today!
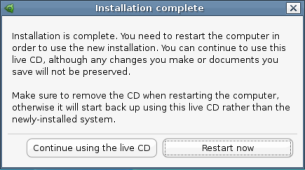
And now, we have reached the end of our journey... actually, your journey has just begun. Just out of curiosity, I actually timed this install. Of course, this is not the first time for me, but I did do it at a leisurely pace - plus I took some of the screenshots you see here. From booting with the CD to rebooting took me just under 55 minutes. Not bad for the so-called 'complicated', 'only-for-geeks' OS. And on top of that, everything worked fine - from playing mp3 files to websites loaded with Flash. Even this article, including all the image editing was done on Linux Mint!
If you discover that you need more help with this distro, go over to the Linux Mint forum and the friendly people there will surely be happy to help.
Meanwhile, go ahead and give that Restart Now button a good whack - and enjoy!
Talkback: Discuss this article with The Answer Gang
![[picture]](../gx/authors/lazar.jpg) Shane is a Medical Resident in Romania. He has been a ardent user of FOSS and Linux since 2004. He spends a sizeable amount of time on Linux forums learning about it and helping others where he can. Currently his favorite distro is Ubuntu, while he has used Mandrake/Mandriva in the past on his desktop and still does for his home network server.
Shane is a Medical Resident in Romania. He has been a ardent user of FOSS and Linux since 2004. He spends a sizeable amount of time on Linux forums learning about it and helping others where he can. Currently his favorite distro is Ubuntu, while he has used Mandrake/Mandriva in the past on his desktop and still does for his home network server.
